A tool to share your own Unity packages with openUPM
The core of sharing packages is to be able to both have autonomous groups of code and assets you can use in multiple projects.
Two years ago, I wrote about how to manage your own assets in the unity package manager. That was not an easy task nor very user-friendly, so it had to be upgraded. A good point that I started then was to split the packages, allowing them to have a unique git repository each.
We also saw a good move from Unity for developers: they dropped the usage of the asset store for assets management, and use the package manager instead (at last)!
The core of sharing packages is to be able to both have autonomous groups of code and code and/or assets that you can use in multiple projects.
So, let’s see what the new workflow is:
- update a package on github (openupm workflow is plugged to github)
- setup the package on openupm
- add openupm as a scoped registry in the project settings.
Update the package on GiT
I won’t offend you by explaining how to set up a git and commit on github, but you still need to follow some guidelines.
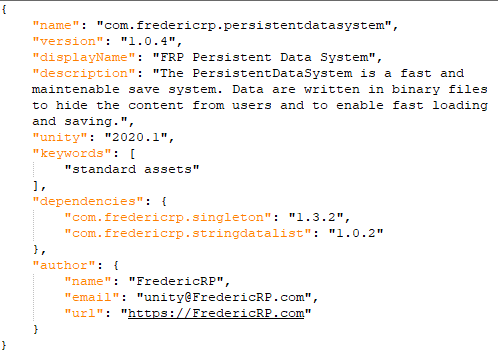
For the package to be usable in the package manager, you have to create a file named package.json on the asset folder that suits the package.json template, see a sample below.
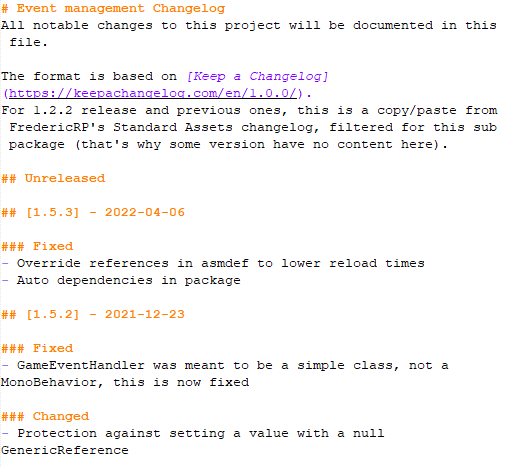
A good practice is also to have both README.md and CHANGELOG.md files at the root of your folder so it’s easy for everyone (you, your team, the other developer that would find your package) to know what your package can do, and the…well, changelog. The readme file is also used to select a default preview image for the openupm package browser.
So, you have your code and assets correctly structured as a package (see my previous post for details) and you committed everything on github, with a tag on it.
Once it’s done, you can add the package manually in Unity, but it’s not enough.
Setup the package on OpenUPM
Go to openupm.com and fill the form: repository name, branch, select the package.json file if it’s not selected by default (useful when in a subfolder), readme and license. See below the first step: once you entered the repository URL (of course, it has to be public!), clicking on the Go button makes openUpm search for details and files in it.
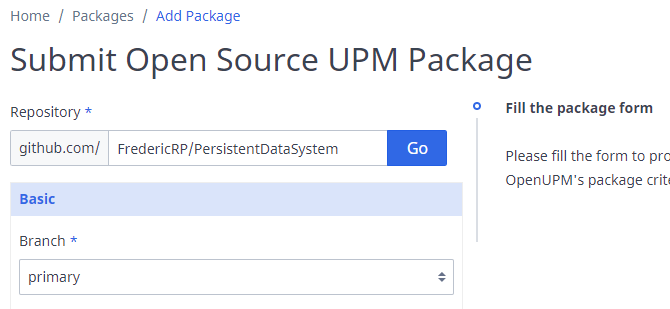
If you have an unusual setup you can also filter on the package name, add a prefix for the version tag, and even a minimum version to build.
You can select a preview image at this step but I advise you not to do so as it’s easier in the update process to update the image in the readme file than update the openupm description.
Once the form is filled, you will have to complete the workflow and wait for the nightly process to be done before you can see the package from unity and see it in the openUPM package registry.
But right now, you’re done with openUPM, the rest will last forever and you won’t have to go back here for a while.
Add openUPM as a scoped registry in unity
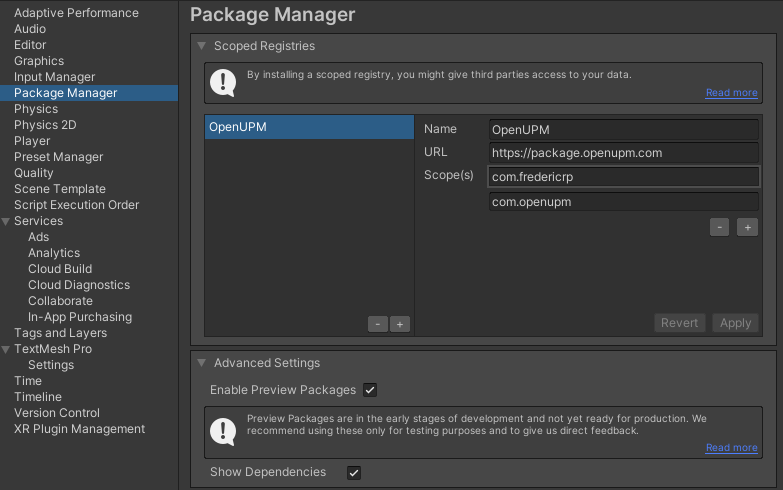
The final step of this new workflow: from the project you want to add your package to, go to your project settings, in the section named package manager where you can add a scoped registry.
From the same registry, openUPM, you can add multiple scopes if you find other useful assets there, so be sure to add every scope you want to so Unity will search for them at the right place.
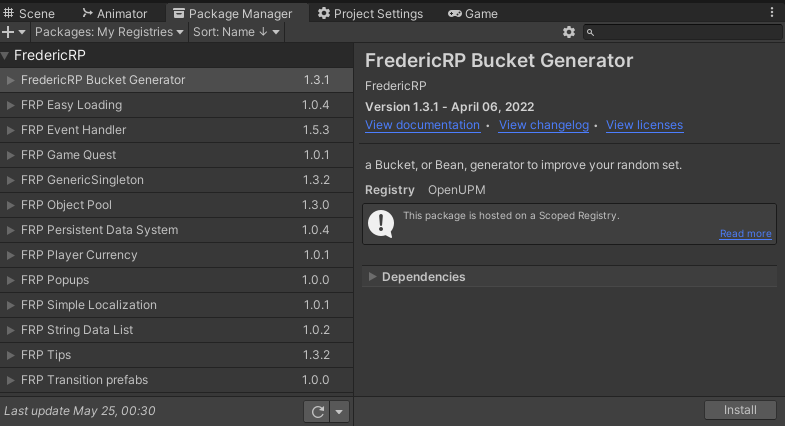
Once it’s done, you will see the matching registries in the unity package manager, under the section “My Registries”. Like any other package, you can install, update and remove the packages directly here, and they will appear under the “Packages” folder of your project.
My free tool for you: Unity Package Tool
Yet, another issue bothered me here: I don’t have any CI/CD workflow for those assets, mainly when I update the version of one package and use it in another one.
With multiple assemblies, I can tell Unity what other package is required so the compile process just works. And with the version name in the package.json file, you can specify the exact dependencies and that is used by the package manager to search, download or update the other packages automatically.
But how can I link those two together? By default, you can not.
Good news: with the UnityPackageTool I made, you are only one click away to get that.
What does the tool is:
- create a list of assembly definition files from the packages in the project
- list the packages.json files and their matching runtime assemblies
- for each package found, update the dependencies from the assembly definition by finding the matching version in other packages.json or the unity package.
The last one was a little tricky as we have to use all assemblies known in the unity project and use an asynchronous API from the package manager, then find the version with the assembly name that matches the following format:
<com.package.name>@<version>
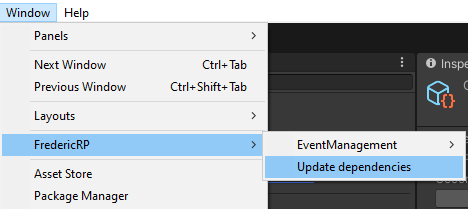
Finally, you only have to click on “Update dependencies” from Window/FredericRP to update all packages.json files in your project to have the correct dependencies (package name and version) found from the assembly definition file!
Understand I needed that tool because I have multiple packages working together. For instance, the GameQuest package uses a lot of other packages like EventManagement, Singleton, and TextMeshPro, so when I update it, I want to make sure everything is synchronized. I also use the updated version of them and sometimes I update other packages from the needs I have in the main one.
With this tool, I don’t have to bother if there was another update in the project: it just fixes the package.json file of the asset I want to commit!
Pros and Cons
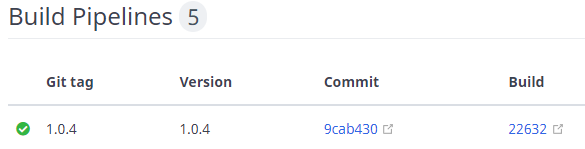
On the good side, this setup allows sharing packages with other projects and making sure they have the correct dependencies with only one click. You can also check it’s working well by checking your package page, on the build pipelines section:
On the downside, this prevents you to fix an issue or make any upgrade of the codebase from the project where the package is added: packages imported like this are read-only, so you will sometimes have to upgrade your package in your source project, then wait for the night process to have it available from the package manager. But I have a schedule that allows switching to another task if a package has to be updated for new needs or fixes.
That way was the easiest way I found to share packages through multiple projects and make them available for everyone. As mentioned before, you can find my packages, and of course this tool, from github.fredericrp.com and openupm.com by searching for “fredericrp.” packages. Let me know if you think this is overkill and/or if you find that another way is better!